
by Ron Chan
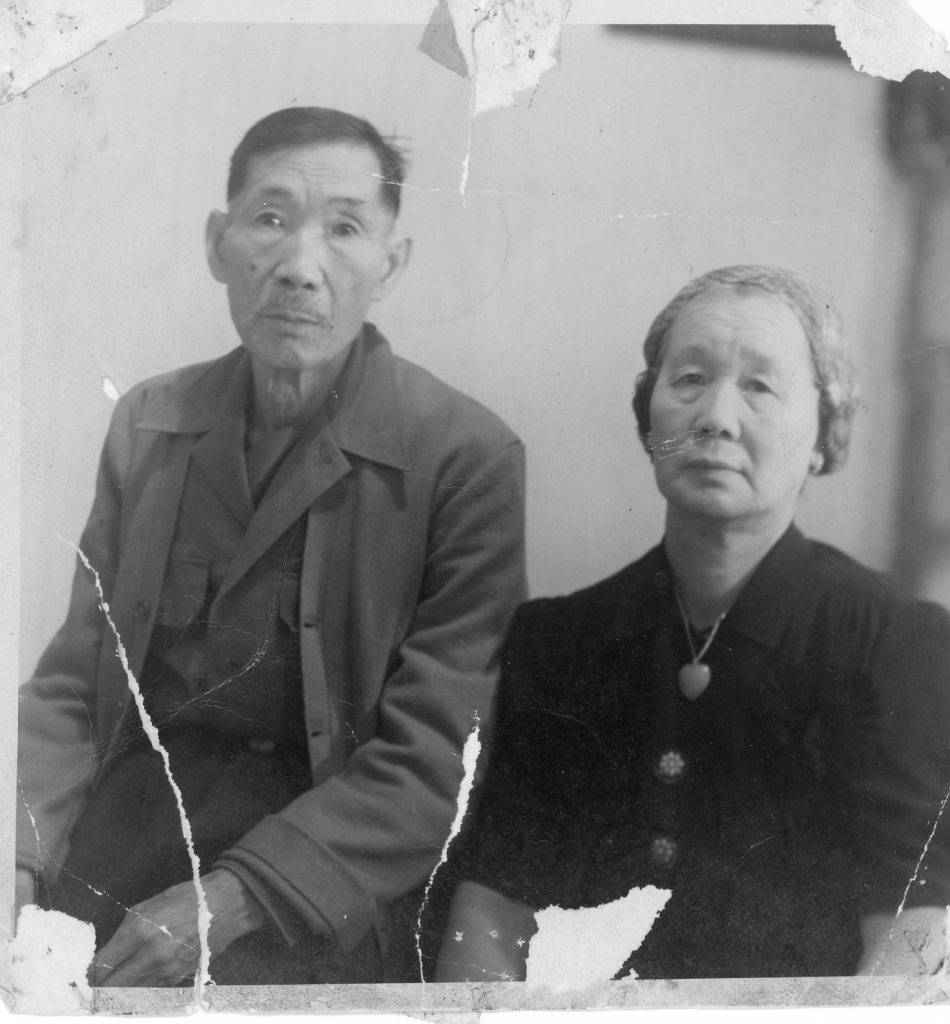
The above 6″x6″ square photo fell out of one of my parents books. Thank goodness I thought to look through it before tossing it aside. This photo, taken in the early 1940’s, are of my mother’s parents – Mar Shee Tong, and his wife Ng Shee. I have never seen this photo before, so it was very exciting to find, but disappointing to find it in such poor condition.
As you can see, the picture is torn, creased, parts of it missing, and held together with tape and the wind. Otherwise it was fine\-) Note also the shot was poorly positioned, as the background ran out so the right edge of the photo, so the photo has an ugly black boarder. But this is the only photo in existence, so worth spending an entire evening restoring it, pixel by pixel.
There are two tools I used. An Epson V600 scanner, and Paint.net for this photo restoration project.
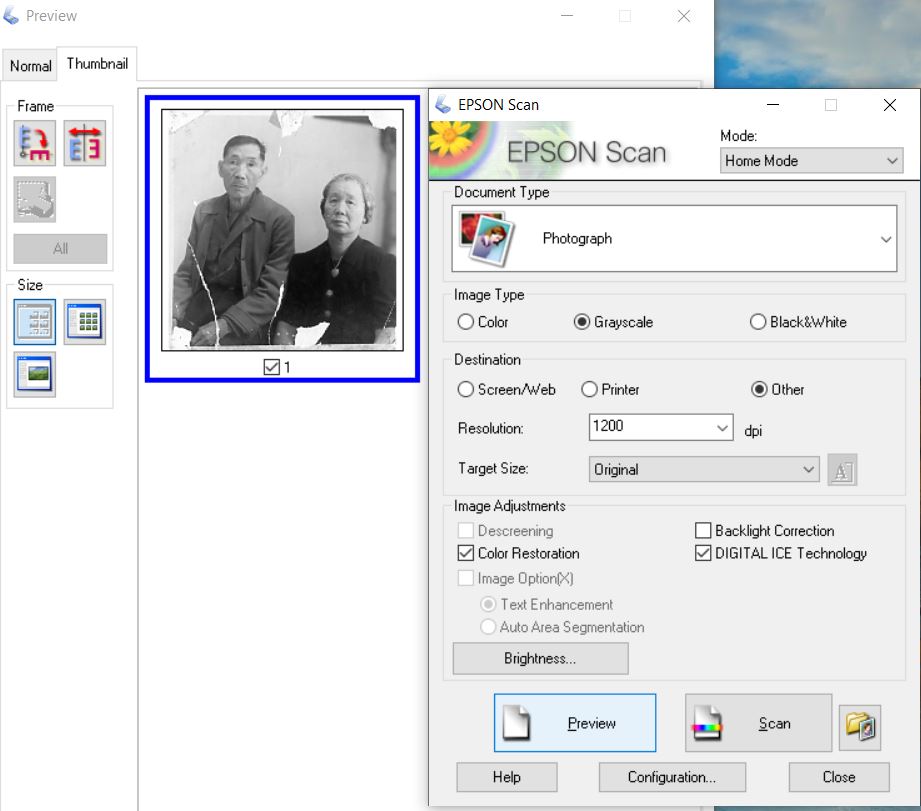
The Epson V600 has a scanning feature option called “Digital ICE Technology”. The ICE feature is one of the key features of why I selected the Epson V600. ICE automatically removes dust, creases, tears and missing parts of the photo. See above for the scanner settings. I first tested the restoration using 300 dpi as it takes less time to scan, and then kicked it up to 1200 dpi to do very high resolution final. Scanning took about 5 minutes, but gives me the resolution latitude to edit and crop as I please.
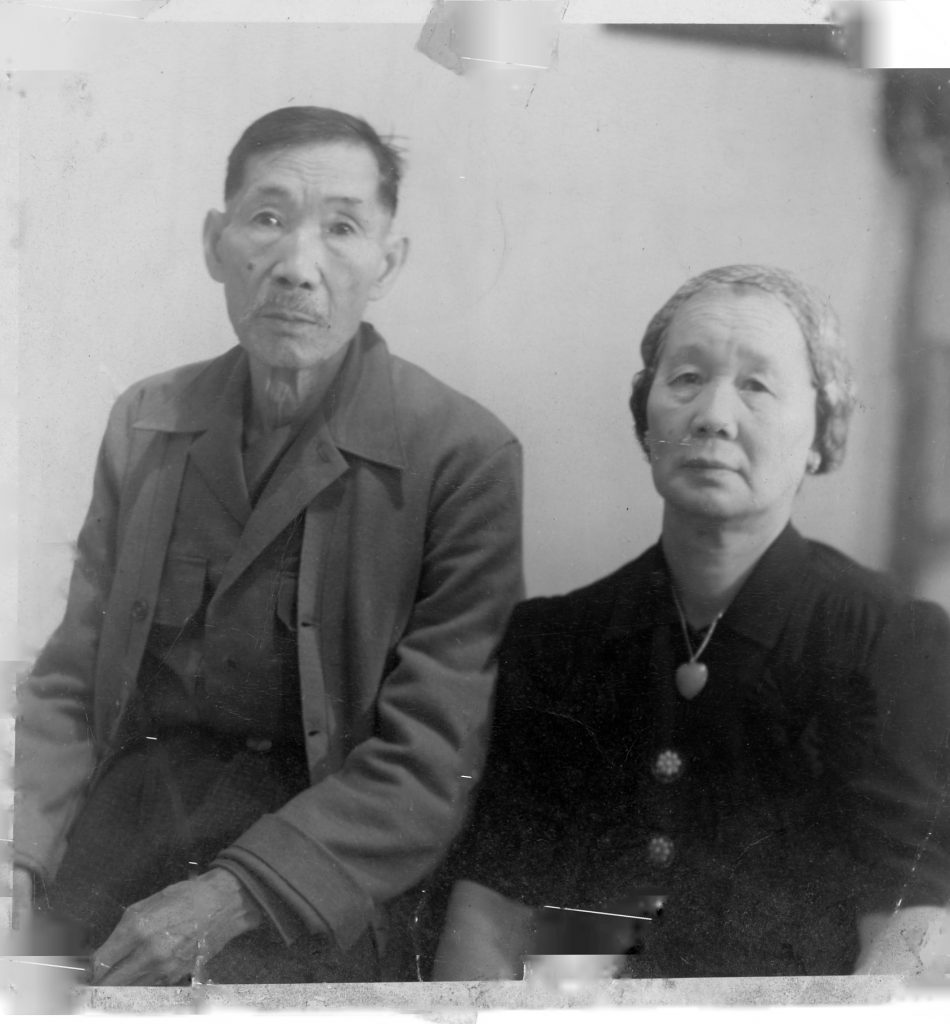
Note with color correction it made the contrast slightly darker, but the major restoration using ICE is that it removed the tears and filled in missing portions of the photo. However there were significant imperfections like like long scratches and cracking surface emulsion. Plus that ugly black boarder on the right side from not framing the subjects well when original photo was taken. The file size was 17mb.
Since 6×6 is not a conventional picture ratio today, I cropped the photo into an 11×14 format. Note that ugly right background is now gone! The clothes are darker and more crisp. All the scratches are gone.
I used Paint.net, https://www.getpaint.net/download.html , which is a VERY easy and free PC program, compatible to the far more complex / costly Paintshop. It took me hours using the cloning tool to move cloned pixels to cover up, add, or replace existing pixels. For example, I sampled the gray background overall, then cloned it to replace the ugly black right boarder.
Did it take hours time? Yes. Was it worth seeing my grandparents renewed? Yes. Helps if you have OCD like me\-) File size after the cropping was 12 mb.
I then took the final black and white photo, and tinted it sepia using Paint.net, to give it that “old time” feel. Sepia file was 15mb.
Then I uploaded the black and white photo to myheritage.com to colorize it. Details in one of my earlier posts. Colorized photo was 2mb.

From the final restored 11×14 ratio photo file, I cropped individual 5×7 portraits of grandma and grandpa for inclusion my family history research. They now live again.
The 5×7 portraits are 3mb … now you know why I stared with a large, high resolution 1200 dpi scan. Anything smaller would have made these 5×7 crops to low a resolution.
Good luck, post a comment if you have any questions.
ron
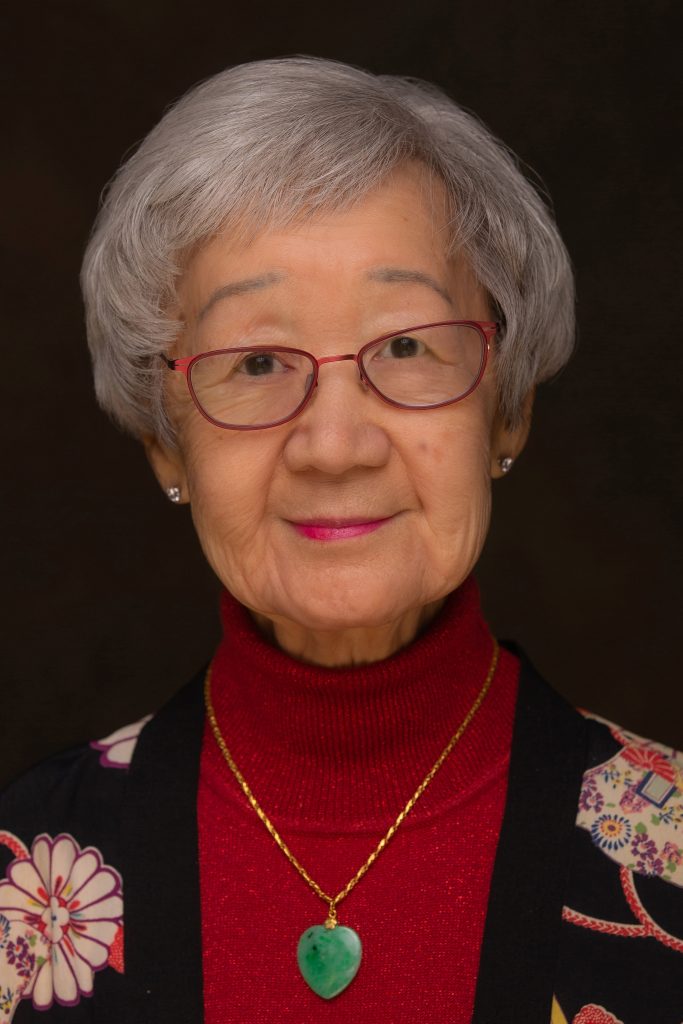
PS … the jade heart that my grandmother is wearing, is what my mom wore for this 2020 portrait. My mom is 91 years old. My mother, outlived her mother. With my dad being 96, it looks like I come from long lived genes … so you folks are going to have to put up with me for another 30 years! \-)
\r
CategoriesSharing InputsPos